My Ice Climbing Kit

While the New England ice climbing season is off to a bit of a sluggish start a follower recently asked if I had a gear list for what I take ice climbing. Thanks for the inspiration for this post Kyle! I’m going to list items in the order that I usually pack my pack.

Hyperlite Mountain Gear Prism Pack

Hyperlite Mountain Gear Prism Pack Review

I’ve tested over a dozen packs specifically designed for waterfall ice climbing and this pack has held onto my #1 spot for best ice climbing pack. You can find my full review of this pack here.

Patagonia DAS Parka

If there is any chance of mixed or liquid precipitation I prefer the reliability of a synthetic insulated belay parka, and the Patagonia DAS Parka is an industry leading choice.

Rab Mythic Ultra Jacket

If there is zero chance of encountering mixed or liquid precipitation I prefer the warmth and packability of a down insulated belay parka, and for that the Rab Mythic Ultra Jacket is an excellent choice.

Black Diamond First Light Hybrid Hooded Jacket

Black Diamond First Light Stretch Hooded Jacket Review

If it is wicked cold out I’ve been known to pack a second light puffy so I can “double up” on my belay jackets. Conversely, if it’s really mild out I might just up for carrying a lighter puffy then the two jackets I mention above. For that the Black Diamond First Light Hybrid Hooded Jacket is a great choice. You can find my recent detailed review of this one here.

32oz Wide Mouth Nalgene Water Bottle

I typically only carry one 32 ounce wide mouth water bottle for most ice climbing day trips. I do not use any type of insulated parka to keep it from freezing. I just pack in above my belay jackets and close to the small of my back. In the coldest of temps I have never had it freeze when packed up against my back. If I want something with more flavor then water I reach for some of my Skratch Labs stash. If it’s a really cold mission, or a really long day, I also pack an insulated water bottle with some Borvo Broth. This stuff really tastes amazing and is an excellent mid-day energy refresher!

AMK Ultra 0.7 Scout First Aid Kit

I use the AMK Ultra 0.7 Scout First Aid Kit as my base first aid kit then I add a few things to it that just live inside the kit. Like the Petzl e+lite headlamp, a small knife, and a small Bic lighter. I also slide a SAM splint down into the back sleeve of my backpack along with a CAT tourniquet.

Hyperlite Mountain Gear Prism Ice Screw Case

Hyperlight Mountain Gear Prism Ice Pack Review

This case is perfect for packing and protecting my ice screws. I’ve used Petzl and Black Diamond screws for over two decades of ice climbing with few complaints. This season I have swapped out almost my entire rack for a set of the new Blue Ice Aero Ice Screws. I’ll have a review out on these as soon as Mother Nature brings the ice back into condition. For sizes my typical set up is one 22cm, eight 13cm, and one 10cm. If heading to the bigger ice at Willoughby I will add four 17 to 19cm screws. I carry a Grivel Candela V-Thread Tool which conveniently nestles inside my 22cm ice screw. In the zippered pocket in the ice screw case I have some zip ties and the allen wrench for my CAMP USA X-Dream Alpine Ice Tools.

Author on Black Pudding Gully, WI4 – photo by Brent Doscher

For clipping ice screws on lead I highly prefer the Petzl Ange Finesse Quickdraws. Notchless wire gate carabiners are the best, and the larger rope side carabiner on these draws is glove friendly. It’s also a better carabiner if you ever climb on a two rope system. I carry 8 of these racked on a Petzl William Screw Locking Carabiner. On this carabiner I also have a “locker draw” that I build from a Petzl Express Quickdraw Sling and two Petzl Attache Locking Carabiners. There is also one “alpine draw” built with a 60cm Mammut Dyneema 8mm Contact Sling and two Petzl Ange S Wire Gate Carabiners clipped to this large locking carabiner, a 180cm Mammut Dyneema 8mm Contact Sling with two Petzl Ange S Wire Gate Carabiners, and a pre-tied “mini-quad“.

The rest of my climbing hardware is all clipper to a large locking carabiner and includes two Petzl Attache Locking Carabiners, my DMM Pivot Belay Device, a 16 foot length of Sterling Power Cord, a traditional 6mm cord tied into a small prussic, a 40cm Edelrid Aramid Cord, and a small carabiner knife.

Inside my Hyperlite Prism Crampon Bag are my Petzl Dart Crampons and I often stuff a pair of Kahtoola MICROspikes in there as well.

Next I stuff my warmer Black Diamond Guide Gloves in. It has to be heinous out there for me to end up switching into these beasts but I won’t risk not being able to keep my hands warm in the winter so these get packed even though I rarely wear them. I do most of my ice leading wearing CAMP USA Geko Ice Pro Gloves and Rab Power Stretch Pro Glove Liners.

Inside my Petzl Sirocco Helmet (review) or Salewa Piuma 3.0 Helmet (I love both these helmets) I pack my preferred ice climbing harness which is the Petzl Sitta (my review) outfitted with three Petzl Caritools.

Black Diamond First Light Stretch Hoody Review
November 25th, 2023 early season ice mission into Tuckerman Ravine, Mount Washingon

In the top pocket of my pack I stick my Petzl IKO Core Headlamp along with some hand warmers, my snacks and food for the day. And since I know you are wondering what my favorite on mountain food choice is I’ll share that hands down the best food to take ice climbing is left over pizza from Flatbread NoCo!

For a rope I prefer the Sterling Rope Fushion Nano IX 9mm by 60m rope. It’s a triple rated rope (single, twin, half) so it is ideal for guiding two clients on multi-pitch ice. I have two of them in the bi-pattern.

While I already mentioned it above my ice tools of choice are the CAMP USA X-Dream Alpine Ice Tools. You can find my original in depth review of these tools here.

Finally on the outside of my shoulder strap I clip my Rocky Talkie Mountain Radio. If you’ve been following me for awhile you know I’m a huge fan of these radios. They make climbing & skiing so much better than it was before. Did you know you can get ten percent off of them with code “AlpineStart10”?

Links above are affiliate links. That means if you make a purchase from an online retailer after visiting those links I will earn a small commission at no additional cost to you. These commissions keep this blog afloat. Thank you.

Well that pretty much sums up what I pack for a day of ice climbing in the White Mountains of New Hampshire. I can go into my clothing system in another post if there is interest. Did I miss anything? What do you bring that I don’t? Got any questions about anything in my kit? Please comment below if you do have a question or if you found this post helpful in anyway. Temperatures are finally getting colder so I’m hoping to get out later this week and actually use this gear for what it is intended for!

See you in the mountains,

Northeast Alpine Start

Common Use FRS Zone Channels in the White Mountains

With the welcomed increase of backcountry travelers using FRS and GMRS radios for internal group communication it is time we utilize a “Common Use Zone” system to improve group to group communication in the most popular zones of our region.

Modeled after the Utah Avalanche Center’s “Group to Group Radio Channel Initiative” this system would be for these intended uses:

Intended Uses & Radio Protocols:
  • A way for riders to communicate with people within their party and more importantly communicate with potential groups below and above you and your group.
  • To send a distress call to your group and other parties to aid in self rescue and to alert of potential threatening avalanche hazards.
  • To ask for someone to call 911 to mount an organized rescue, when 911 can’t be reached directly on your own.
  • Radio communication between partners at areas of safety
  • Radio communication regarding potential hazards, snow and avalanche information
  • Radio communication when you and your group are clear of a given line or area

Radio Communication between you and your group:
  • Radio communication between partners at areas of safety
  • Radio communication regarding potential hazards, snow and avalanche information
  • Radio communication when you and your group are clear of a given line or area
  • General communication

Radio Communication between multiple groups:
  • Route selection and timing to avoid riding directly above other groups
  • Radio communication regarding potential hazards, snow and avalanche information
  • Radio communication when your group is clear of a given line or area, alerting other groups of a clear run-out zone
  • General communication

Here are some examples of the types of communication you might share or hear on these common use zone channels:

“This is Sarah on channel 21 reaching the ridge via the south snowfields. With no signs of instability and inconclusive hand shears our party of three is heading over to the top of Main Gully”

“This is Mark on channel 20, we just pulled out a small wind slab on our approach into Left Gully. Due to poor visibility we are transitioning here and dropping the bottom third of Left in a few minutes.”

“Mayday, mayday, mayday. This is Lisa on channel 19, we have a medical emergency near the base of Yale Gully. We are unable to raise 911. Does any one copy?”

The use of these radios does not take the place of solid decision making and carrying a Personal Locator Beacon like the Garmin inReach Mini 2 that can initiate a rescue if outside of both cell phone service and the limited range of FRS/GMRS radios.

It’s important to understand that most FRS radios are single channel monitoring. Some GMRS radios can monitor two channels simultaneously but may require a license.

The Common Use Zone Channel List*

Tuckerman RavineFRS/GMRS Channel 22
Gulf of SlidesFRS/GMRS Channel 21
East Snowfields & Raymond CataractFRS/GMRS Channel 20
Huntington RavineFRS/GMRS Channel 19
Great GulfFRS/GMRS Channel 18
Burt RavineFRS/GMRS Channel 17
Ammonoosuc RavineFRS/GMRS Channel 16
Oakes Gulf/Dry RiverFRS/GMRS Channel 15
Crawford NotchFRS/GMRS Channel 14
Franconia NotchFRS/GMRS Channel 13
Evans NotchFRS/GMRS Channel 12
GBA GladesFRS/GMRS Channel 11

*No CT or Privacy Codes (0)

In order to send and receive traffic on these channels from other groups you must ensure your radio is not using a CT/DTS privacy code. Check your radio’s user manual on how to turn these privacy codes off (or set to zero).

Recommended Radios

Common Use FRS Zone Channels
The author touring a slide path in Burt Ravine (Channel 17) with his Rocky Talkie Mountain Radio

Rocky Talkie Mountain FRS Radio <- My pick for 95% of people 10% off with “ALPINESTART10”

Rocky Talkie 5-Watt* FRS/GMRS Radio My pick for professional mountain guides, avalanche course instructors, search & rescue teams 10% off with “ALPINESTART10”

Backcountry Access BC Link 2.0 FRS Radio

Backcountry Access BC Link Mini FRS Radio

Motorola Talkabout T600 H20 2-Way FRS Radios

*Due to using over 2 watts of power of the Rocky Talkie 5-Watt* FRS/GMRS Radio requires licensing with the FCC. The process is quite simple online, took me about 30 minutes to complete, and cost $35. Detailed instructions how how to obtain a license can be found here. The above links are affiliate links which means if you purchase a radio through these links I will earn a small commission at no additional cost to you.

I’m hoping this suggestion becomes widely adapted by our backcountry community. Since a growing percentage of backcountry travelers are already carrying radios it makes good sense that we improve the overall communities safety by adapting a common use zone list like this.

ZONE MAP STICKERS! $2 each!

Common Use FRS Zone Channel Map

3 x 3 inch stickers of the zone map pictured above are available! Put one in your field book and on your skis or board! $2ea., free pickup in Conway, NH, or $1 S&H. Venmo preferred. Please include local pickup or shipping address with payment.

See you in the mountains,

Northeast Alpine Start

References

https://utahavalanchecenter.org/education/group-group-radio-channel-initiative

UTILIZING COMMON RADIO CHANNELS IN HIGH-USE AVALANCHE TERRAIN

Rocky Talkie List of Community Channels by State

Affiliate links above support this blog

Spivo Video Editing Service Review

Usually I review outdoor gear and provide technical tips for climbing and backcountry skiing here but today I’m reviewing something a little different… a video editing service. I first heard of Spivo through a sponsored Instagram ad soon after returning from a 7 day backcountry ski trip to Iceland. The timing was great as I had a lot of video and still footage from the trip so I reached out to see if I could get a sample of there service to share with you. The response was positive and I was soon logging into the service to upload my videos and photos to see what they could do with.

Spivo Video Editing Service Review

It’s pretty simple actually. You start by requesting a video edit quote for yourself, someone else (great gift idea), or a business. Next question is what kind of video you would like with choices being; Travel or Adventure Video, Action Sport or Motorsport Video, Vlog Video, or Event, Honeymoon or Wedding Video. Then you select how long you want the finished edit to be with options ranging from less than a minute to a full half-hour, with “3 to 6 minutes” being labeled as “most popular”. Pricing will then be displayed with discounts and promotions available if you purchase more than one editing project. Here’s a couple examples of current pricing with a few different selections:

Cinematic Adventure Video Edit 1-3 minutes long in 1080p HD Quality: $219

Cinematic Adventure Video Edit 1-3 minutes long in 4K/360 Videos: $319

Cinematic Wedding Video Edit 6-9 minutes long in 1080p HD Quality: $349

Once you select your options and checkout you will receive an email with a link to upload your files. My sample order was for a 3-6 minute edit and allowed up to 20Gb of uploading. I was interested in going through the entire process only on my iPhone and it was quite simple to select the videos and photos I have in My Photos and start uploading them. I selected about 5Gb (everything I took in Iceland) and started uploading. At some point I must have disconnected from WiFi and it appeared everything wasn’t uploaded. I couldn’t easily see which videos or pics from my phone didn’t get uploaded so I reselected my geo-tagged Iceland photos and did a second upload assuming the editors would recognize any duplicate images/files.

Once everything was uploaded I wasn’t exactly sure if I needed to do anything else. A quick message to the company was responded to promptly directing me to log back into my video edit order page (easy) and answer just a few more questions before their editors would start working on the project. There were just a few questions about any direction I wanted to give, key moments, creative thoughts, and a chance to select a music theme from possible hundreds of unlicensed options. I really wanted to let the company do what it felt was appropriate creatively so I basically just answered “editor’s choice” to each of the customizable options. Once that was completed I received an email stating they would get to start on my edit and I would receive the video within 7 days!

Six days later I received the email that Felix had finished editing the video and it was ready to view and download! You can watch the video before downloading and share it via a link. This is helpful if you watch it and decide it needs any revisions (free revisions until you are happy with the video or full refund offered).

Downloading the video on my iPhone was pretty simple but it took me a minute to figure out where it was located. I found it “Files” on my iPhone, and could then click on “Save Video” to have it findable in the more convenient “Photos” app on the phone. I could then easily upload it to YouTube, Instagram, and Facebook.

The original edit ended up being 4 minutes and 48 seconds long. I immediately liked the soundtrack that Felix selected as it fit the Icelandic landscape quite well. The cuts were smooth and polished and in great time with the music. My overall impression was it was a quality edit of the probably hour or more of videos and photos I had uploaded if but just a tad long. Here it is with out any revisions being requested if you’d like to see.

Being an Instagramer I reached back out to the company to see if 60 second edits were an option and was told a 60 second highlight edit can be requested for an additional $50. A few days later I received another email with my shortened highlight edit. I really liked the cadence and length of this edit for today’s busy digital consumer clocking in at 1:07. Here it is:

Summary

So the big question, is the service worth it? With prices ranging from low 200s to high 300s for most projects the answer is it depends. Ever since my first iPhone and discovering the iMovie app I’ve enjoyed learning to edit my own home family movies and adventure projects. I rate my editing skills as solidly mediocre. If you are not great at editing this service makes a lot of sense after a cool vacation or adventure somewhere. There’s also the time it takes to edit these projects… My own amateur edit of the same trip ended up being about two minutes in length but took me 5-6 hours of editing to get it down to something I wanted to share. You can see my edit of this trip here if you’d like to compare. A lot of people might not have the free time, or the motivation, to sort through all the video and images you captured on your latest adventure to create something memorable and entertaining. I think it’s also clear my edit is pretty amateur and the Spivo edits have a professional level of polish! I can definitely see why this service has a market and is probably doing quite well!

Wedding Videos!

I also think the idea of using this to create a wedding video is a very novel idea and likely a few thousand dollars cheaper than hiring a professional videographer for your wedding. Just think about it, if you have everyone who is at your wedding taking videos and pictures and they can all just upload to a central place like Spivo where they then edit and produce your wedding video in 7 days for less than $500? I’ll be suggesting this to my brother who is getting married this June in fact!

See you in the mountains.

Northeast Alpine Start

A media sample of this service was provided for purpose of review. Affiliate links above support the content created here at no additional cost to you. Thank you!

Gear Review- Rocky Talkies

Communication is crucial to safe backcountry travel, and nothing helps improve communication than a quality set of radios. This past summer I received a new pair of Rocky Talkies to review and after 6 months of hard use I’m ready to share my thoughts on them!

Durable

Right out of the box I could feel how durable these radios are. First there is the shatterproof front screen that is transparent for the LED display. Then there is the removable rubberized case for all-around drop protection. The case fits so snugly I didn’t even realize it was removable until I really started to dig into the radio after months of use. There isn’t much reason to remove the case unless you’re carrying spare batteries (more on battery life later).

Rocky Talkie Review

In addition to having all this drop protection the radio comes with one of the most robust tether systems I’ve ever seen on a radio. A full strength Mammut Wall Light carabiner attaches the radio to my shoulder strap (or on my harness gear loop when not wearing a pack), and a metal snap-link auto retracting tether acts as a solid back-up and allows the radio to easily stay in reach.

Rocky Talkie Review
Photo by Kirsten Gehl

For water resistance the radios carry an IP56 rating, meaning they are splash-proof and snow-proof but should not be fully submerged. I’ve noticed no effect after having my pair routinely exposed to heavy rain or waterfall spray while guiding waterfall rappelling trips all summer so I have a fair amount of confidence in this level of resistance.

Clarity

The second feature that caught my attention was during my very first test run. I was standing at the top of a 200 foot waterfall and my co-guide was at the bottom as we prepared to send our guests down the rappel we had set up. I called him to make sure we were good-to-go and his response came back clearer than any radio, including some of the expensive and bigger radios I have been issued for search & rescue. The audio quality of these little hand-held radios far exceeds any of the other radios I have tested. It almost doesn’t sound like a radio, and sounds more like a 5 bar LTE connection with a modern smartphone!

Rocky Talkies Review

Simplicity

There are only five buttons, which makes this radio incredibly easy to use right out of the box. No need for programming, though you can use advanced features to add privacy codes. A power button, channel flipper, push-to-talk, and volume up and down. So simple! With these buttons you are able to scan all channels, lock and un-lock the radio, change between high and low power, change channel, change privacy codes (CT, DCS), and check battery life.

Range

This was one of the hardest features for me to truly test as I am almost never that far from my clients or partners. Alpine rock climbing in Huntington Ravine we are always within 60 meters of each other. This winter back-country skiing that distance can increase to a maximum of a half mile… still way within the suggested range. So I’ll share the claims and some of the great info Rocky Talkie has released to help address this popular question.

This is a 2-watt radio… the strongest watt option available that doesn’t require a license to transmit on. The antennae is fixed, which is something I like as other radio models I’ve used have removable antennas that often have been loose (and once almost lost).

Rocky Talkies Review
Image from rockytalkie.com

Rocky Talkie makes these range claims:

Line-of-sight: 25+ miles
Mountains: 1 to 5 miles
Forest/Hills: 0.5 to 3 miles
City: Up to 1 mile

Rocky Talkies Review
Image from rockytalkies.com

To further illustrate how the range of these radios, and many radios in general, are effected by the terrain they are being used in they published this excellent blog post addressing this topic.

Battery Life

I found the battery life to be substantial, especially for such a small radio. My informal testing showed the battery would last for over 12 days of use while guiding both waterfall rappelling and rock climbing trips. These were 5 to 8 hour long trips were radio use was light. Based on that I would expect I could easily get 3-5 cold backcountry ski tours in before needing to charge. It charges with a USB-C to USB-a cable (included).

Some more info on battery life from the manufacturer:

The Rocky Talkie has a rechargeable Lithium-ion battery with a capacity of 1550 mAhrs. Battery life is dependent on how frequently the radios send and receive signals. With normal usage, the battery can be expected to last 3-5 days (assuming the radio is used 8hrs/day). The battery will last over 120 hrs when in standby mode (the radio is on but not transmitting or receiving signals). The battery life was tested in high power mode (2 Watts), so you can expect a slightly longer battery life on low power mode (.5 Watt).

Dedication to Rescue Teams

Rocky Talkie has pledged to donate $2 of every radio sold to search and rescue teams. They are giving $10,000 every year through an annual award and through a grant program. That kind of support from a manufacturer is really appreciated!

Summary

Rocky Talkies Review

For under 5 ounces this might be one of the best things you could add to your outdoor kit when it comes to overall team safety. The rugged feel of these radios inspire confidence in their longevity. The crystal clear audio instills confidence that the message I am sending or receiving will be understood. While there are a lot of handhelds on the market these days, you’d be hard pressed to find many other options that were obviously designed for with the climber and skier in mind!

Video

Purchase

As I finish this review I see that they are currently sold out… not surprised as I’ve watched outfitters and rescue teams across the country snap these up. The guide service I work for, Northeast Mountaineering, has purchased a fleet of 10 for our guides to use this winter! They should be back in-stock by early November…

10/15/20 UPDATE! They are back in stock!

Purchase Online Here

Update 6/22/2022 PURCHASE LOCALLY!

Also for my local followers I have a small inventory of these available to purchase locally! Save $10 on each and don’t worry about shipping charges! Plus if you like I will personally give you a quick in-person tutorial on the features of these great radios! I will be traveling a lot this summer between Conway, NH and Plymouth, NH and able to meet in either area!

See you in the mountains,

Northeast Alpine Start

Media samples were provided for purpose of review.

Cascades Climbing Trip Gear List (updated 2019)

Those who know me know I can be a little obsessive about gear. I enjoy making detailed gear lists for trips sometimes weighing everything down to the ounce. I shared my first gear list for ski touring in Iceland this past April and most recently in a trip report for climbing Mount Shuksan in the Cascades. I’ve decided to give the gear list its own post that can be easily linked too without taking up so much space in the trip reports located at these links:

Part 1: Fisher Chimney’s, Mount Shuksan

Part 2: The West Ridge, Forbidden Peak

Part 3: Disappointment Cleaver, Mount Rainier

(Note: Originally posted from summer 2017 trip I am currently updating some links to newer or more preferred models)

Packing for Cascades Climbing Trip

Having over 20 years in outdoor retail I love chatting about gear so if you have any questions about any of my recommendations, or suggestions for better products, please comment below!


Cascades Gear List


Hyperlite Mountain Gear 3400 Ice Pack

Hyperlight Mountain Gear 3400 Ice Pack

At just over 2 pounds this pack has enough space for 3-4 day alpine endeavor’s, rides comfortably, and is made of materials that will last for over a decade of adventure! Also made in Maine!

Buy from Hyperlite Mountain Gear


Black Diamond FirstLight Tent

First Light Tent.jpg

A super lightweight and pack-able 2 person single wall tent. I spent 12 nights in this from car camping between climbs to dug in at 11,000 feet at Ingraham Flats on Rainier and the tent performed perfectly through-out!

Buy on Backcountry       Buy on Amazon


Western Mountaineering TerraLite 25 Degree Sleeping Bag

Western Mountaineering TerraLite 25 Degree Sleeping Bag

This was the best gear purchase I’ve made in over a decade. I have a few sleeping bags from a great heritage -30 EMS down bag to a fairly light 35 degree synthetic sleeping bag but I decided to upgrade for this trip and I could not have been happier for my first Western Mountaineering sleeping bag! I’ll go into greater detail in a review later but for now I’ll just say I slept GREAT in this compressible lightweight sleeping bag!

Buy on Backcountry          Buy on Amazon


Sea to Summit Reactor Thermolite Sleeping Bag Liner

Sea to Summit Reactor Thermolite Sleeping Bag Liner

This goes with me everywhere. It’s super comfy on airplanes as a blanket and in hostels around the world. I also like that it keeps my expensive down sleeping bag clean (extending its life) even after weeks of griming sleeping!

Buy on Backcountry         Buy on Amazon


Therm-a-Rest NeoAir XLite Mattress

Therm-a-Rest NeoAir XLite Mattress

I upgraded from my older, heavier, bulkier Therm-a-Rest Prolite sleeping pad with this in “short” and doubled it up with the closed cell foam pad listed below. It was a great combo for both warmth and comfort!

Buy on Backcountry      Buy on Amazon


Therm-a-Rest RidgeRest SOLite Mattress

Therm-a-Rest RidgeREst SOLite Mattress

Affordable added warmth and comfort, I used a full length model to pair with the short model mentioned above for a very comfortable and adaptable combo.

Buy on Backcountry         Buy on Amazon


MSR WindBoiler 1.0 L Stove System

MSR WindBoiler 1.0 L Stove System

This stove was amazing on this trip! Super fast and efficient for melting snow I could easily budget just 2 ounces of fuel per person per day assuming we had water sources at Lake Ann and below Winnie’s Slide bivy site.

Buy on Amazon       Buy on Backcountry


Food

For dinner and breakfast I went with Mountain House meals. The egg scrambles were one of my favorite. For a dinner appetizer I carried a Lipton noodle soup packet and combined it with a Miso soup packet, great for replacing lost sodium and electrolytes! The Mountain House Pad Thai and Chicken Fajita Bowl both tasted great!


Sea To Summit Delta Spork With Knife

Sea to Summit Delta Spork

Simple lightweight option to make meal time easy!

Buy on Backcountry        Buy on Amazon


Arcteryx Acrux Mountaineering Boots

Arc'teryx Acrux AR Mountaineering Boots

My mountaineering boots of choice, full review of them here. While I LOVE these boots for my cold New England ice climbing and mountaineering adventures they turned out to be a little too warm for Shuksan and Forbidden (but perfect for Rainier, more on that later). My co-guide Jordan who has been having a banner season in the Cascades was rocking the Salomon S-Lab X Alpine Carbon 2 GTX Boots… these things look AWESOME! Basically comfy enough for long warmish approaches, crampon compatible, and climb rock really well… I will be getting a pair of these before my next summer Cascade adventure!

Buy Acrux AR Mountaineering Boots on Backcountry       Buy on Amazon

Buy Salomon S-Lab X Alpine Carbon 2 GTX Boots on Backcountry      Buy on Amazon


Petzl Vasak Leverlock Crampons

Petzl Vasak Crampons

Make sure you select the Leverlock or FL option! Great all around mountaineering crampon in my book! I have led grade 5 ice in them and walked hundreds of miles in them from Washington to Katahdin over the last decade and they are still going strong! I do plan to shave a little weight for these longer glaciated non-water ice routes by picking up a pair of Petzl Leopard Crampons soon!

Buy Petzl Vasak Crampons on Backcountry          On Amazon

Buy Petzl Leopard on Backcountry        On Amazon


Leki Micro Vario Carbon Trekking Poles

Leki Micro Vario Carbon Trekking Poles

The lightest most compatible trekking poles I have ever seen! I’ve been loving these! I’ve used them all over the White Mountains including a 2 hour car-to-car ascent of the Northeast Ridge of the Pinnacle! You can see them during one attempt in this video.

Buy on Backcountry        Buy on Amazon


Black Diamond Raven Pro Ice Axe

Black Diamond Raven Pro Ice Axe

This has been my mountaineering axe for almost 15 years and is the right balance of weight and durability.

Buy on Backcounty       Buy on Amazon


Petzl Sirocco Helmet

Petzl Sirocco Helmet

Finally got the latest version of this iconic helmet and went into a ton of detail in a long form review last month here!

Buy on Backcountry       Buy on Amazon


Petzl Sitta Harness

Petzl Sitta Harness

I brought this harness for the more technical climbing on Shuksan and Forbidden and my full review of it is here.

Buy on Backcountry       Buy on Amazon


Petzl Altitude Harness

Petzl Altitude Harness

I brought this harness for the less technical Disappointment Cleaver route on Mount Rainier. Super lightweight, pack-able, and able to put on while wearing skis. It is everything I want in a mountaineering harness. Detailed review coming soon.

Buy on Backcountry       Buy on Amazon


Petzl CORDEX Lightweight Belay Gloves

Petzl CORDEX Lightweight Belay Gloves

If ropes are involved these come with me. They were perfect for the warmer daytime glacier temps and offer great protection for rappelling, short-roping, etc.

Buy on Backcountry      Buy on Amazon


Sterling Evolution Duetto Dry Rope, 30m 8.4mm

Sterling Rope Evolution Duetto Dry Rope

A solid choice for glacier and ski mountaineering trips.

Buy on Backcountry      Buy on Amazon


MSR Snow Picket 60 cm

MSR Snow Picket

Two per rope team is ideal! I also pre-rigged this with a double length Dyneema sling and Petzl Ange S carabiner.

Buy on Amazon


AMK .7 First Aid Kit

AMK .7 First Aid Kit

I customize mine a little but this is a great base kit at the price!

Buy on Backountry      Buy on Amazon


Suunto MC-2 Compass

Suunto MC-2 Compass

My favorite and trusted compass/clinometer for the last two decades!

Buy on Amazon


Nalgene Tritan 32 oz water bottle

Nalgene Tritan 32oz Wide Mouth Bottle

A staple of every outdoor adventure, I carry two of these for my hydration needs!

Buy on Backcountry    Buy on Amazon


SOL Emergency Bivy Sack

SOL Emergency Bivy Sack

Super affordable and weighs less than 4 ounces means there is never a reason not to bring this!

Buy on Amazon


Revo Cusp S Sunglasses

I have the Solar Orange lens on this pair for lower light conditions

Buy on Amazon


SPOT Satelite GPS Messenger

SPOT 3 Satelitte GPS Messenger

Cell phone service is very spotty on Mount Shuksan. I was able to find a bar or two of service (Verizon) at Lake Ann (southwest side) and send and receive a few text messages. We had no service at the bivy site at the top of Fisher Chimney’s however I was able to FaceTime my wife from the summit! For the times with no service the SPOT GPS Messenger easily allowed me to send “check-in” messages home and in my opinion is an important piece of rescue gear should an incident occur.

Buy on Amazon


Petzl Reactik+ Headlamp

Reactik+.jpg

The new Reactik+ is awesome! Up to 15 hours of burn time from an easy to recharge via USB battery with 300 lumens and able to throw light 360 feet! If you’re due for a headlamp upgrade I highly suggest you check out this model!

Buy on Backcountry


Petzl Zipka Headlamp

Petzl Zipka Headlamp

I always carry a spare headlamp on multi-day adventures and this is my choice back-up model. It’s small enough to fit in my first aid kit but still bright enough to function as a real headlamp.

Buy on Backcountry       Buy on Amazon


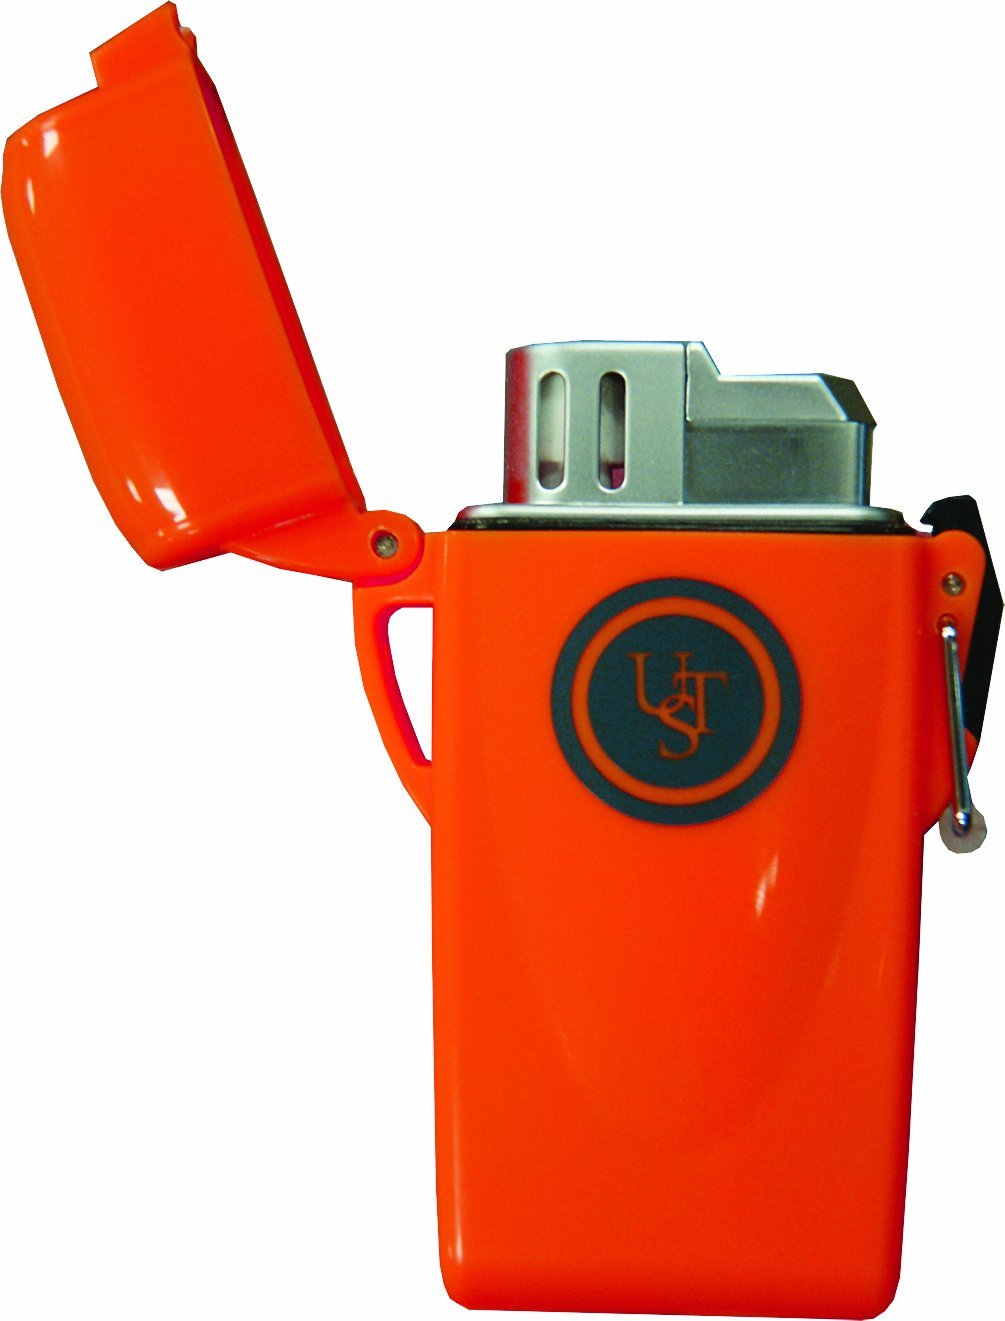
Quality Survival Lighter

UST Floating Lighter

Fire-starter is on every gear list, and this one is a good value!

Buy on Amazon


Garmin Fenix 5X GPS watch

Garmin Fenix 3 HR Watch

My current favorite GPS navigation capable smart-watch with optical heart-rate! This is the watch I used to create the GPS tracks linked in the trip report. It also allows one-button waypoint saving and the built in barometer/altimeter was a nice plus to our navigation plans. (Updated this to the newest model which is high on my wish list!)

Buy on Backcountry


GoPro Hero 7 Silver

GoProHero7.jpg

A great little HD cam with advanced features beyond this post. You can see some of the footage about a minute into my Forbidden Peak video! (updated 2019 link to the amazing new GoPro 7 for the great onboard stabilization! <- currently reviewing)

Buy on Backcountry


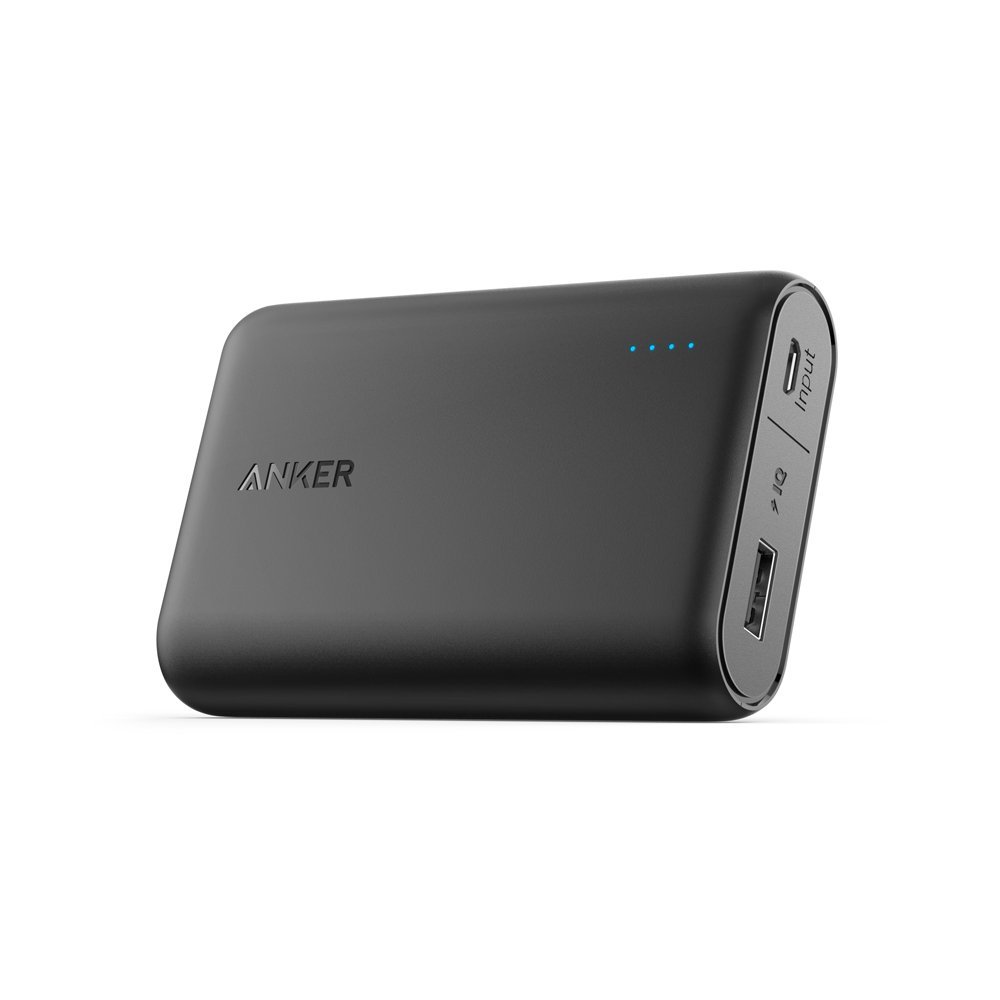
Anker PowerCore 10000 Charger for iPhone, GoPro, etc

Anker PowerCore 10000

This thing was great! About the size of a deck of cards it packs 10,000mAh which easily provided 4 full re-charges for my iPhone 6s and still have 50% juice left!

Buy on Amazon

Clothing


Black Diamond Alpine Start Hooded Jacket

Black Diamond Alpine Start Hooded Jacket

I absolutely love this piece and went into great detail about it in an in-depth review here.

Buy on Backcountry       Buy on Amazon


Black Diamond Alpine Light Pant

BD Alpine Light Pant.jpg

I’ve been wearing these back east for most of my Spring/Summer climbing season with multiple trips in Huntington Ravine and through-out the White Mountains so I felt confident taking them as my main climbing pant to the Cascades. Having essentially lived in them for two weeks of non-stop climbing I can whole heartedly endorse the comfort and performance of these soft-shell pants!

Buy on Backcountry     Buy on Amazon


Patagonia Technical Sunshade Hooded Shirt

Patagonia Technical Sunshade Hooded Shirt

This is in my opinion the most critical piece of glacier clothing you can own. I reviewed it in detail here but on a shade-less blazing glacier this one garment offers more protection and comfort than any other article of clothing I own. I’ve said it before and I will keep saying it… EVERY climber should own one of these! I do have a small cult following of “sunshade hoodies” who have “seen the light” or better yet “appreciate the shade” that these things bring… just get one and thank me later ok?

Buy on Backcountry


Patagonia Micro Puff Hoody

PatagoniaMicroPuff.jpg

Feather-weight feels like down but isn’t down ultimate “Light Puffy” choice.


 Clothing to be linked soon:

Patagonia Fitz Roy Belay Parka

EMS Powerstretch Climb Hoodie

EMS Powerstretch Long Underwear Pants

One synthetic T-shirt

One Ortovox Rock & Roll Boxers

One pair midweight socks

One pair heavyweight socks

One pair lightweight glove liners

One pair midweight Outdoor Research Project Gloves

Outdoor research sun ball cap

iPhone 6s+ with headphones & charger


Crevasse Rescue Kit- Petzl Micro Traxion, SL OK, Tibloc, Sm’D, Oscilla
Personal Climbing Gear- Kong GiGi with Black Diamond Magnetron and Gridlock, Magnetron and Petzl Reverso 4, Cordelette with Petzl Ange S, 2 prussiks, knife, Petzl Cordex Belay Gloves on Petzl Ange S, Petzl Attache anchor biner
Group climbing gear- Alpine Rack and Draws
Group climbing gear- Sterling Nano IX 60m rope
Group climbing gear- Sterling Nano IX 28m rope

Thanks for reading! Got a question or comment? Please comment below!

All trip reports done!

Part 1: Fisher Chimney’s, Mount Shuksan

Part 2: The West Ridge, Forbidden Peak

Part 3: Disappointment Cleaver, Mount Rainier


Affiliate links help support this blog

Gear Review- HitCase Ferra iPhone Case

I had already been a huge fan of HitCase after reviewing the HitCase Pro iPhone case back in October 2018. You can find that full review here. Now HitCase has entered the more casual/stylish iPhone case market with the new HitCase Ferra model and I was happy to receive a media sample to check out a couple months ago.

In a market flooded with fashionable iPhone cases I was curious why HitCase would deviate from their “hard-core” type protective cases. As the founder and CEO of the company says, “Protective products on the market today are focused on making products cheaper, but in the race to make things cheaper, things got worse, sharp edges, flow lines, rough textures, careless design.”

Hitcase Ferra iPhone Case Review
HitCase Ferra Case with TrueLux SuperWide Lens

HitCase definitely doesn’t take short-cuts with their cases and the Ferra looks and feels like a swanky hand-crafted Italian leather phone case. With 2 meter drop protection it certainly isn’t as bomber as the Pro case which boasts a 5 meter drop protection rating, but 2 meter’s is pretty good for a casual case. Stainless steel buttons add more style and I appreciate having access to my mute switch through an open port while using the case.

The best thing about the case, and all HitCases for that matter, is the ability to use the TrueLux lenses with the case.  These lenses open up the photography capabilities of the already amazing iPhone X to new levels. With Macro, Wide, and SuperWide options you can get pretty creative with your smartphone photography. One important distinction between the Ferra and the more active sport Pro model is how these lenses secure to the case. While the HitCase Pro has these lenses secure by a few screw threads keeping the lenses safely attached during bumpy mountain bike or ski descents they only attach to the Ferra with a bit of magnetism. This is fine (and fast) for casual use/outdoor photography but if you want to shoot while being less stationary you might be better off with the HitCase Pro.

Hitcase Ferra iPhone Case Review
HitCase Ferra iPhone Case with attached TrueLux Super Wide Lens

Summary

The HitCase Ferra is for someone who likes hand-crafted leather and wants something more than a cheaply made case to accessorize their tech. The ability to use the TrueLux lenses with a casual case is an additional benefit. While I appreciate the style my iPhone is now snuggled back in the HitCase Pro case which has become my all time favorite case so far! If you are looking for a really nice casual iPhone case maybe the HitCase Ferra is for you?

See you in the mountains,

Northeast Alpine Start


Affiliate links help support this blog. A media sample was provided for purpose of review.

Gear Talk: Radios in the Backcountry

using radios for Backcountry Skiing and Mountaineering
Matt Jones checks in using the BCA Link Radio before dropping in, Jones Pass, Colorado- photo by Bianca Germain

Over the last few years I’ve realized how important being able to quickly and clearly communicate with my partners in the mountains is. So much so that I’ve added a pair of hand-held radios to my “essentials” list. I started using BCA Link Radios while working on Mount Washington to stay in touch with other guides who worked for the same outfitter I did. After missing this reliable way to communicate on a recreational ski tour I started taking them with me on every ski trip. I also find them well suited to alpine and ice climbing gullies with long technical pitches that end at anchors out of sight (Pinnacle Gully and Black Dike are perfect examples).

The ease of being able to clearly communicate without yelling over the roar of the wind or interpret “rope tugs” adds greatly to your risk management strategies. Other benefits include being able to monitor National Weather Service current conditions and forecasts for your regions, summon outside help outside of cell phone coverage, and even tune into local FM stations on some models. I’ll share a few models worth looking at if you need to pick up a set of radios to improve your capabilities in the mountains.


Backcountry Access BC Link

BCA Link Radio

We had a fleet of these at the guide service I first worked with. They are simple to use, rugged, and convenient. The “Smart Mic” allows you to access all the controls you need without having to take the radio out of your pack. Equipped with 22 FRS and GMRS channels and 121 sub-channels it is compatible with all standard FRS/GMRS radios.

  • Group Communication System with Smart Mic and base unit
  • Water- and dust-resistant to IP56 standards
  • Compatible with all standard FRS/GMRS radios
  • 2.5-mile line-of-sight range ensures adequate coverage
  • 140 hour maximum battery life keeps unit running all day (3.7 Volt Lithium Ion)
  • Temperature operating range between -4F to 158F
  • Smart Mic is compatible with 3.5mm TS or TRS earphone plug
  • Battery charger included

Pros: Super user friendly to first time radio owners. No licenses needed to operate. Rugged and Water Resistant (IP56). Convenient Smart Mic. Can program local NWS channel for weather updates. Integrates well with BCA line of Airbags and Stash backpacks. Removable battery means you can bring extra batteries on a trip.

Cons: A little pricey but discounted now that there is a new version out! Can not program channels that would require a license to use outside of emergencies.


Backcountry Access BC Link 2.0

BCA Link 2.0 Radio

The new version boosts some significant improvements over the time tested original. More power means greater range, with the 2.0 offering up to 6 miles (line of sight), more than double the range of the original. A stronger battery (2300mAh lithium ion) also gives you more time between recharging (400 hours vs 140 hours in the original). A redesigned Smart Mic claims to better shed snow when you’re riding in face shot territory.

  • Two-way radio built for backcountry touring
  • Smart Mic offers glove-friendly handling
  • Rechargeable battery offers 400 hours of standby power
  • Recommended line-of-sight usable range of 6 miles; max of approximately 40-miles

Pros: Super user friendly to first time radio owners. No licenses needed to operate. Rugged and Water Resistant (IP56). Convenient Smart Mic. Can program local NWS channel for weather updates. Integrates well with BCA line of Airbags and Stash backpacks.

Cons: Pretty expensive, but this is a high-end choice in the realm of FRS/GRMS radios. Can not program channels that would require a license to use outside of emergencies. Battery is no longer removable so you can’t bring extra batteries (but you can charge with a standard charger or USB)


BaoFeng BF-F8HP

radios for backcountry skiing

The last few years I’ve been using the BaoFeng BF-F8HP and have been quite happy with them. With up to 8 watts of output they have great range. They can be programmed for FRS/GRMS. They can also be programmed to monitor and broadcast on licensed channels so care must be given you do not break FCC rules. You can listen to FM radio while the radio still monitors the channel your group is using, so if a communication is received the radio automatically mutes the FM radio station you were rocking out to while skinning up that non-consequential slope. You can also monitor National Weather Service regional weather.

Pros: Affordable. Dual band (monitor two channels at same time). Listen to local FM radio while hanging around camp or moving through no risk terrain. Can program local State and Federal frequencies to be used in case of emergency*

Cons: Not as water/weather resistant as the BCA Link Radios. I’ve ruined two in accidental immersion incidents (waterfall rappelling). In heavy rain I would want to keep this in the pack, maybe in a dry sack. “Boom mic” is not included and not as glove-friendly as BC Link Radios. I keep this radio out on my shoulder strap. Care must be given that you do not broadcast on frequencies that require licensing. If you need a fleet of them it’s good to have someone with a data cable and the PC software “Chirp” to program them.


What is legal?

Navigating what frequencies don’t require a license can be tricky. The BC Link Radios are quite powerful FRS/GRMS radios that keep it simple. The BaoFeng can land you a $15,000 fine if you are caught using licensed channels. Because of this I’ve decided to pursue an Technician license. An even easier to get license is the “Amateur” license and would probably make these issues even clearer.

You are allowed to monitor (listen) to channels that require a license to transmit on. You are also allowed to transmit on these channels without a license in the case of a real emergency. From the FCC:

Part 97.403: Safety of life and protection of property.

No provision of these rules prevents the use by an amateur station of any means of radio communication at its disposal to provide essential communication needs in connection with the immediate safety of human life and immediate protection of property when normal communication systems are not available.

All that said I’m looking forward to pursing a license so I can better answer these questions.


Summary

While some of the details of licensing can be unclear (without proper education) one thing that is clear is that handheld radios like these help us travel more safely and efficiently in the mountains. Here is an example of a conversation that could not happen with out radios from the top of a backcountry ski run:

“Dropping in 3” – alerts group I’m starting the first pitch of my ski run.

“Clear”- let’s group know next person can follow, I’ve stopped at a safer spot.

Even outside of avalanche terrain radios can assist with conveying hazards as they are discovered.

“Stay hard right at first corner to avoid a water bar”

In an alpine climbing scenario easily talking with your belayer when 50 meters apart and out of sight is comforting. None of the “Did he say off belay or OK?”. Was that three tugs or does she just need more slack?

Having both NWS weather updates and FM stations (BaoFeng) on long trips can help keep you informed and improve morale if stuck in your tent for an extra day waiting for good weather.

All of these reasons are why radios have become a part of my “essentials” every time I go into the mountains. Once you start using them you’ll wonder why you haven’t been using them all along!

Disclaimer: I do not have any level of radio license and information provided above may be incorrect. I will update this post after I have acquired a license but would love any comments from current licensed operators below and will make suggested edits where appropriate!

See you in the mountains,

Northeast Alpine Start

Gear Review: Hitcase PRO iPhone Case

HitCase PRO phone case review

I’ve tested most of the top brand iPhone cases designed for rugged outdoor use and the Hitcase PRO 2.0 is a standout in the category. I’ve been steadily beating on mine since last July when I received both the case and some of the accessories that sync so well with the Hitcase PRO design. A quick disclaimer before we start! Since I take all my pics with my iPhone I have zero images of the case since it hasn’t come off my phone since I put it on! Most images in this review are courtesy of Hitcase. Now let’s take a quick look at what makes this iPhone case so bad-ass.

Mountable

The most distinctive feature of the Hitcase Pro is the “railslide” mounting system. Essentially Hitcase designed a rugged rail on the side of the case that allows you to quickly and securely attach the phone to a great selection of different mounts.

The monopod “ShootR” is basically a well though out selfie-stick! It’s super light and pack-able but the best feature is how it connects to the Hitcase railslide mount. This makes it feel very secure when shredding sick lines or hucking off a bridge into the river.

Hitcase Pro phone case review

You can easily capture GoPro style footage while being hands free with the ChestR Mount.

Hitcase Pro phone case review

There’s also mountain bike mounts, helmet mounts, vehicle mounts, and more! You can see the full selection of mounts here. The case can also attach to any GoPro® compatible mount, including drones, gimbals, and more.

Better Photography

The other big standout feature of Hitcase cases is the TrueLUX lenses that can attach to your iPhone camera to capture amazing images. With Macro, Wide, and SuperWide options these lenses definitely help you take shots you wouldn’t think possible on a smartphone.

Hitcase Pro iphone case review

Hitcase PRO iphone case review
With no TrueLUX lens

Hitcase PRO iphone case review
With TrueLUX Wide lens

Hitcase PRO iphone case review
With no TrueLUX lens in portrait orientation

Hitcase PRO iphone case review
With TrueLUX Wide lens in portrait orientation

Protective

Finally the case offers the type of protection you would expect from an “extreme” case. Waterproof and drop-proof to 16 feet. While I haven’t fully submerged mine I did have it in my pocket multiple times this summer while running Waterfall Rappelling courses. On more than one occasion it was exposed to high pressure directly in the waterfall and never experienced a leak!

Media

See this case in action in this promotional video!


Summary

My iPhone is one of my biggest investments especially since I upgraded to the X this year for the amazing camera. I take it on countless rock and ice climbs all year along with lots of back-country skiing and mountaineering trips. For those reasons I have to protect it! The Hitcase Pro goes beyond mere protection and adds utility and flexibility greatly increasing the value of the iPhone’s own camera. I’ve found myself leaving the GoPro at home more and more these days and just shooting everything on my iPhone. If you need solid protection for your phone and like to shoot outdoor active photography this might be the perfect phone case for you!

See you in the mountains,

Northeast Alpine Start


Disclaimer: Media samples were provided for purpose of review. All opinions are my own. Affiliate links help support the content created here at Northeast Alpine Start at no cost to you. Thank you!

Gear Review: Most Rugged iPhone X Cases for Extreme Sports

There are already lots of reviews out there claiming which iPhone cases, out of literally hundreds, are the most protective. You will find models on some of those lists whose biggest “plus” are that it comes in 8 different colors with popping eye-catching patterns. I don’t need that. I need a case that can protect my investment in the most extreme weather conditions on the planet. I also don’t want a case that makes carrying my phone outside of my profession of mountain guiding awkward.

Most Rugged iPhone X Cases
Most Rugged iPhone X Cases- photo by Jared Heath

To that end I reached out to argue-ably the four biggest companies in iPhone case construction and asked for their most rugged model case to be submitted for review. Some manufacturers provided more than one model as they had models that would appeal to different end-users. After a full winter of back-country skiing, ice climbing, and mountaineering on one of the most inhospitable mountains in the world, I’m ready to share my opinions of these models, starting with my personal “Best in Class”. Full reviews for each model will post over the next few weeks and be linked here.


Best In Class: ROKFORM Fuzion Pro iPhone X Case-> (Review)

Best Waterproof Model: CATALYST Waterproof iPhone X Case (review coming soon)

Best for Impact Protection: PELICAN Shield iPhone X Case (review coming soon)

Likely* Best for Outdoor Photography: HITCASE Pro (not available yet, ships in May)


ROKFORM Fuzion Pro

Rokform Fuzion Pro iPhone Case Review
Rokform Fuzion Pro iPhone Case Review- photo by Brent Doscher

Buy from Rokform

Buy from Amazon

Most Rugged iPhone X Cases
ROKFORM-iX-FuzionPRo-GunMetal- photo from Rokform.com

One of my favorite of the cases I tested was the ROKFORM Fuzion Pro Case. It is the only case in the line-up made with carbon fiber but the design of this case far exceeds the material used in its construction. Despite being a very modular case installation was really easy. After pushing the phone into the rubberized housing an aircraft aluminum exo-skeleton backed with carbon fiber easily snaps over the housing to secure the phone.

Most Rugged iPhone X Cases
Rokform blends high quality materials with innovative design to create “Fuzion Pro”- photo from Rokform.com


Before assembly you must select which insert you want to use.

The TwistLock is designed to secure your phone with a bombproof connection to various bike, motorcycle, and car mounts. This is the best way to secure your phone if you will be bombing down single track mountain bike trails, racing Motocross, or even doing a bit of 4×4 off roading in that beat up Jeep Wrangler of yours!

Most Rugged iPhone X Cases
So many options!- pic from ROKFORM.com

What really sets this model, and company for that matter apart, is the other type of mount they use. The magnetic lock has been a bit of a game changer for me. At first I just liked using the Super Grip Vent Mount in our vehicle. I have gone through quite a few “universal” window mounted phone holders over the years and have had issues with almost all of them. They typically break after a year or two and they create blind spots in your field of view. This little vent mount works flawlessly and keeps my phone where I want it without any blind spots in the front window. It also packs well so is perfect for those who often drive rental cars!

What I didn’t realize was how many other places having a magnetic phone case added convenience. When I head into the kitchen to start breakfast I just stick my phone right onto the refrigerator. I listen to the latest Podcast while getting the kiddos packed for school and when it’s time to grab the car keys and rush out the door there’s no searching for my phone.

Even while I’m typing this my phone is secured to the edge of my computer desk and not lost in the slightly chaotic mess of things I know I will organize and read soon!


Buy from Rokform

Buy from Amazon


Drop/Water Protection

As far as true protection, the ROKFORM Fuzion Pro exceeds Military Drop Test Standard MIL-STD 801G-516.6 (basically can survive multiple falls from 2 meters (6.6 feet). Only two other models in the test had higher ratings. The case works with Rokforms’ own high-end screen protector or any other third party protector.

The case is not waterproof, but the iPhone X features native IP67 Water Resistance. What that means is it can withstand a quick dunk in up to three feet of water. This level of water-resistance is enough for non-water sports and allows this case to have virtually zero impact on sound quality both from the iPhone speakers and to a greater extent while talking to someone on speakerphone. Most fully encased waterproof cases make the caller sound like they are in a tin-can when using their speaker phone (it drives my wife nuts!). If you do need 100% waterproof-ness check out the CATALYST Waterproof iPhone X Case and the Pelican Marine Cases, both of which I will submit detailed reviews on soon!

The only thing I could think to improve was the lack of a lanyard. However after a quick call to the company to confirm this feature was missing I was guided to the fact that there is a lanyard attachment point on the aluminum housing that works with most third party lanyards, and of course Rokform’s own lanyard! So not much I can suggest changing here… this is an awesome case!

Summary

The ROKFORM Fuzion Pro is a standout in the category of rugged outdoor iPhone X cases. While it doesn’t come in sparkly glitter colors it really is a well engineered blend of materials and design. With the TwistLock option for “must not disconnect” extreme sports and the MagneticLock for everyday convenience this is definitely one of the best all-around cases I tested.


Buy from Rokform

Buy from Amazon


See you in the mountains,

Northeast Alpine Start

Affiliate links help support this content.

20 Holiday Gifts for the Mountain Lover

Chances are if you are reading this you have a climber, skier, hiker, mountain biker, or trail runner in your life. You’ve probably already started to see “holiday guides” come from various retailers and bloggers. Here I present my personal hand selected gift ideas for the adventurous mountain traveler in your life. Some are locally hand-crafted ideas from friends and others are time tested national brands so please take a look!

Hydro Flask ($25-$40)

hydro-flask-options

This socially responsible company makes the coolest water bottles and tumblers out there! Super high quality stainless steel technology keeps cold drinks cold for 24 hours and hot drinks hot for 6 hours! Customization and tons of color and style options means there is a Hydro Flask out there for just about everyone! Check out their Holiday Gift guide here.


Friendly Foot Shoe Deodorizer ($11)

Friendly Foot Shoe Deodorizer

I’m pretty sure the 10 seconds of silence from my girlfriend after asking her to marry me was enough time for her to accept that she loved a man with some seriously stinky feet. Luckily she said yes and I would soon find this foot powder, seriously the only product that works on my feet! 7 years later she is quick to remind me if she notices my supply running low. This one is a PERFECT stocking stuffer, pick it up on Amazon here.


Life Straw ($20-$55)

IMG_2395

Life Straw Steel
Life Straw Steel

Another socially and environmentally conscious company Life Straw makes getting safe drinking water possible with innovation and effective products. I have been using the Life Straw Steel model over the last couple months and it’s becoming a standard part of my day kit.


SPOT Gen3 Satellite GPS Messenger ($149.95 Sale $74.89)

SPOT Gen3 Satellite GPS Messenger

This device allows someone to summon help even when they are far away from cell phone service. It provides piece of mind to my wife when I’m out on a week long trip in the mountains by allowing me to send “check-in” messages that show her where in the world I am. This is an excellent gift for the adventurer in your life!


VSSL Supplies ($50-99)

VSSL Supplies Survival Gear Review
VSSL Supplies Survival Gear

I’ve had the VSSL Supplies model for two years now and it’s an integral part of our home emergency kit (extended power-outs) and comes with us on road trips as part of our “on the go” kit. While it’s a little heavy for me to take climbing I know a few hunters that have added it to their day kit and it has a lot to offer the casual back-packer and car-camper. See my detailed review I posted here!


Darn Tough Socks ($15-$27)

Darn Tough Socks
Darn Tough Socks

Possibly the best socks I’ve ever owned and made right over the border in Vermont! For mountaineering and ice climbing check out this model! These socks come with an unconditional lifetime guarantee and make an excellent stocking stuffer!


Mountains For Breakfast Cozies ($18)

Mountains For Breakfast Sweater

My friend Brittni started this hand-crafted company just last year and I’ve been seeing her work at local coffee shops and at the crags! The iconic “drink sweater” is right at home keeping that pre-climb coffee warm or that post-climb beer cold! I’m definitely excited to be giving something handmade to some of my loved ones this season!


MaxxDry Heavy Duty Boot and Glove Dryer ($55)

MaxxDry Boot and Glove Dryer

Every home in the Northeast should have one of these! It’s effective enough that I can easily dry my boots and gloves along with my wife’s in just a couple hours. No balancing them over the floor base heaters or getting them too hot near the wood-stove and risking early de-lamination! You can pick on up on Amazon here.


Anker PowerCore 10000 Re-charger  (25.99)

Anker PowerCore 10000
Anker PowerCore 10000 re-charger

This charger sees almost daily use as I use my iPhone extensively while out climbing and for most of my video editing. What I like most about this charger is that I can get at least 3 full charges from it and it charges much faster than a wall outlet. You can pick this stocking stuffer up on Amazon here.


Sea to Summit Reactor Sleeping Bag Liner ($57.95)

Sea to Summit Reactor Thermolite Sleeping Bag Liner

This goes with me everywhere. It’s super comfy on airplanes as a blanket and in hostels around the world. I also like that it keeps my expensive down sleeping bag clean (extending its life) even after weeks of grimy sleeping!

Buy on Backcountry         Buy on Amazon


Sea To Summit Delta Spork With Knife ($3.95)

Sea to Summit Delta Spork

Simple lightweight option to make meal time easy!

Buy on Backcountry        Buy on Amazon


Petzl CORDEX Lightweight Belay Gloves ($34.95)

Petzl CORDEX Lightweight Belay Gloves

If ropes are involved these come with me. They were perfect for the warmer daytime glacier temps and offer great protection for rappelling, short-roping, etc.

Buy on Backcountry      Buy on Amazon


AMK .7 First Aid Kit ($32.95)

AMK .7 First Aid Kit

I customize mine a little but this is a great base kit at the price!

Buy on Backountry      Buy on Amazon


SOL Emergency Bivy Sack (13-$23)

SOL Emergency Bivy Sack

Super affordable and weighs less than 4 ounces means there is never a reason not to bring this!

Buy on Amazon


Petzl Actik Headlamp ($44.95 sale $33.71)

Petzl Actik Core Headlamp

I recently upgraded from my older Petzl Myo model and this new model is awesome! Up to 260 hours of burn time and able to through light 90 meters! If you’re due for a headlamp upgrade I highly suggest you check out this model!

Buy on Backcountry   Buy on Amazon


Quality Survival Lighter ($14.99)

UST Floating Lighter

Fire-starter is on every gear list, and this one is a good value!

Buy on Amazon


Big Ticket Items!


GoPro Hero 5 Session ($299.99)

GoPro Hero5 Session

A great little HD cam with advanced features beyond this post. You can see some of the footage about a minute into my Forbidden Peak video!

Buy on Backcountry      Buy on Amazon


Garmin Fenix 3 HR GPS watch $300-$700)

Garmin Fenix 3 HR Watch

My current favorite GPS navigation capable smart-watch with optical heart-rate! This is the watch I used to create the GPS tracks linked in the trip report. It also allows one-button waypoint saving and the built in barometer/altimeter was a nice plus to our navigation plans. I would like to upgrade to the new Fenix 5 soon!

Buy on Backcountry   Buy on Amazon


Ortovox S1+ Avalanche Beacon ($489.00 sale $391.20)

Ortovox S1+ Avalanche Beacon

My personal favorite avalanche beacon with a host of advantages over other beacons on the market. Super fast processor and “Smart Antennae” technology helps you find and be found faster. On sale on Backcountry.com now!


Revo Goggles

Revo Goggles
My friend Bianca sporting the Revo Onix with Blue Water Lens during our trip to Iceland last April! photo by Brent Doscher Photography

These high end goggles out perform every other brand I have ever tried. As a brand ambassador I can share my promo code “ALPINESTARTF&F” which will get you 20% off when ordering directly from www.revo.com!


Education!

Northeast Mountaineering

Perhaps your loved one has been talking about taking an ice climbing course or avalanche safety course for a couple of years now but hasn’t pulled the trigger? Give them the nudge they need with a gift certificate for a course at Northeast Mountaineering! Also be sure to use promo code “DavidNEM” when you book a course for a chance to win a free guided adventure of your choice!


Memberships ($35-$80)

UPDATE: A couple readers pointed out an excellent gift idea is a membership to an organization dedicated to access, education, and conservation. To that end I’m embarrassed I didn’t think of that without the nudge so may I also include a membership to the Access Fund and/or the American Alpine Club, two organizations I have supported through membership for over the last 15 years!


Shop Local!

While I do love these online deals I want to take up this space by encouraging you support local businesses, especially small specialty climbing shops, with your business! To that end if you can physically visit this stores please do!

International Mountain Equipment, North Conway, NH

Ragged Mountain Equipment, Intervale, NH

Outdoor Gear Exchange, Burlington, VT

Well that’s my list! I guess it was 25 items. I hope this helps you shop for your loved ones this holiday season!

See you in the mountains,

Northeast Alpine Start


Affiliate links support this blog