Part 2 of this three part Cascade climbing series will cover The West Ridge of Forbidden Peak.
Part 2: The West Ridge of Forbidden Peak

Part 1: Fisher Chimney’s, Mount Shuksan
Part 2: The West Ridge, Forbidden Peak
Part 3: Disappointment Cleaver, Mount Rainier
After our successful summit of Mount Shuksan via the Fisher Chimney’s we took a rest day and camped at Douglas Fir Campground. The next day we drove to the ranger station in Marblemount to collect our back-country permit and then took the scenic Cascade River Road to the trail-head.
The Route
The West Ridge of Forbidden Peak is one of the “Fifty Classic Climbs of North America” and is considered Grade II, YDS 5.6. After a half day approach into Boston Basin the route climbs a perennial snow field before ascending a moderate gully to one of the most spectacular ridge climbs you can imagine. Massive exposure with relatively good rock quality and a stunning summit make it easy to see why this route made the aforementioned list!
Registration Details (from NPS.gov)
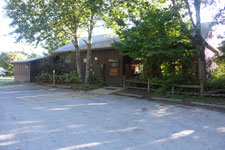
WILDERNESS INFORMATION CENTER
Click here for current hours
Phone: 360-854-7245
Location: 7280 Ranger Station Rd., Marblemount, WA 98267. Drive SR 20 toward Marblemount. Turn onto Ranger Station Road, which leaves SR 20 at milepost 105.3, just west of Marblemount, and drive 0.7 miles to the end of the road and the ranger station.
Exhibits: Exhibits about wilderness and backcountry travel. Relief map. Sales of books, maps, and other items related to wilderness, hiking, and climbing.
Available Facilities: This center is the main backcountry permit office for North Cascades National Park and the adjacent Ross Lake and Lake Chelan National Recreation Areas. Information desk. Sales area with books, maps, videos, and other items related to the national park and adjacent national forests. Backcountry permits are required year-round and are available at an outdoor self-issue station when the station is closed during the winter season.
Getting There
Marblemount, WA is just under two hours from Seattle. After obtaining your permit from the ranger station it’s about a twenty five minute drive to the unmarked trail-head.

Weather
We went for the second half of July and were lucky to nail a 12 day stretch of excellent weather. June, July, and August can all offer great summer alpine climbing conditions with June being a bit colder and wetter and August opening up a bit more crevasses on the glaciers. For mountain specific weather forecasts on Forbidden Peak go here:
Mountain Weather Forecast- Forbidden Peak
Day 1 GPS Details

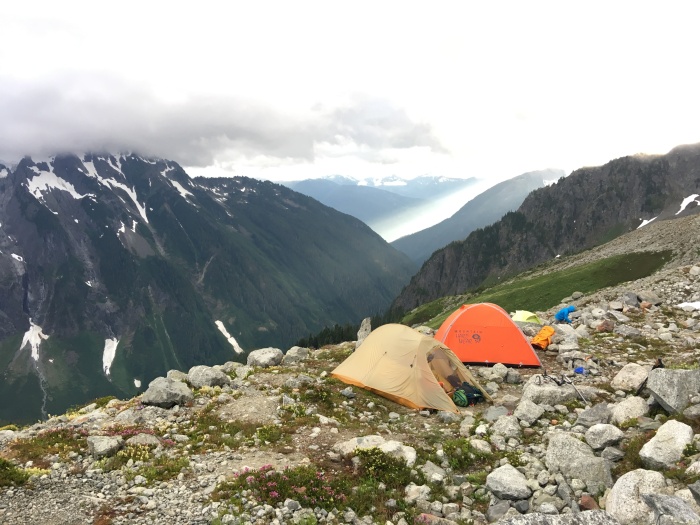
The approach trail climbs about 3,300 feet in 3.75 miles and took us exactly three hours. We found some level tent sites at the “upper bivy” right at the toe of the snowfield that provided plenty of running water. A few brief showers came through and we were treated to some excellent “god rays” as the sun set and we turned in for an alpine start.
The next day we started out at about 4 AM.

Day 2 GPS Details


Easy climbing up through the snowfield brought us to the start of the gully that would allow access to the ridge. The “Heartstone” is a rock buttress directly above us in the photo that serves as a good landmark for finding the snow gully that is hidden from view. The route climbed up thinning snow just to the left of this feature. In the gully proper the snow climbing was straight forward until we hit a glide crack that required a big balance step to surmount. The snow ended about 200 feet from the ridge so we pitched out a few short 3rd-4th class pitches. This stretch was the only place on the ascent that had a decent amount of loose rock so care was needed.
We stashed our mountaineering boots, crampons, and ice axes and switched into approach shoes for the rest of the climb in the small col on the ridge. The exposure begins almost immediately with a airy step over a gap in the ridge with a chock-stone that perfectly frames the lower snow gully you just climbed up. You can see this spot clearly in the video I will link further below.
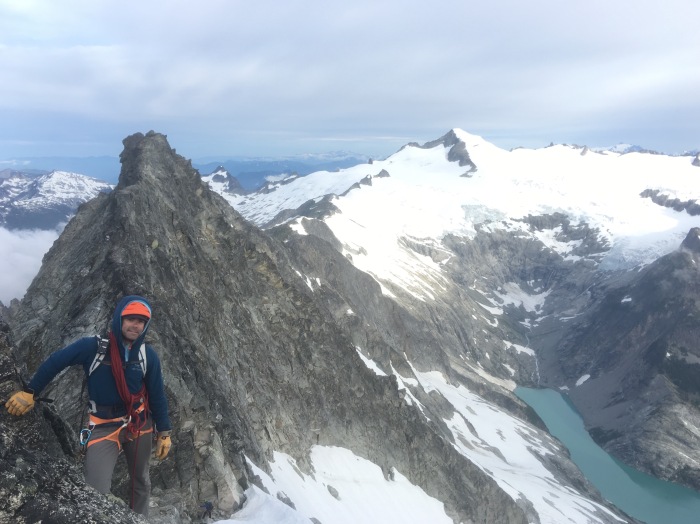
The climbing was enjoyable, the rock felt solid, the views were un-believe-able… For speed we mixed up our techniques between simul-climbing and short-pitching with only about 20 meters of rope between us. This made for easy communication and simplified rope management.


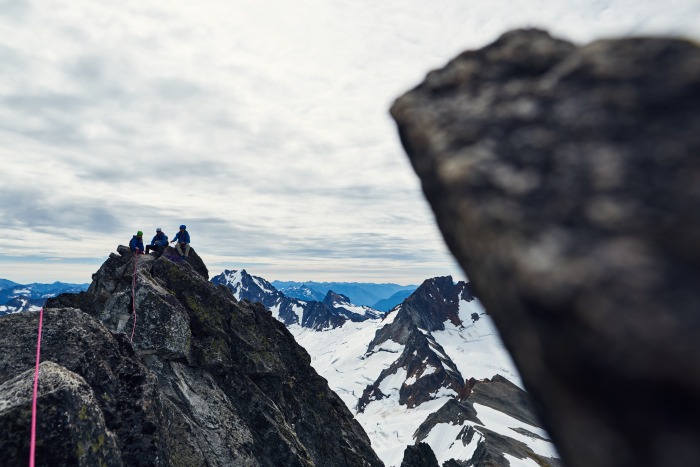
We made the summit in 7.5 hours after leaving our camp in Boston Basin having climbed 3.9 miles and over 2,500 feet in elevation. The small pointed summit of Forbidden is one of the most amazing places I have ever stood in the mountains. The terrain is so dramatic as you look back along the ridge you just traversed and see the thousand feet of air on each side.

Descent
After refueling we reversed direction and returned to the col to collect our snow gear. We then scrambled down to skiers right of the snow gully we had ascended and located the first rappel anchor in “Cat Scratch Gully”, an alternate 4th class ascent route to the snow gully. Five 30m rappels brought us to back to the snowfield where we enjoyed some decent boot glissading in the warming snow all the way back down to our camp.
We packed up camp and hiked back out to the trailhead in just under 2 hours.
Summary
I’ve had some time to reflect on this climb and I can say with certainty it will be one of the most memorable climbs of my life. I feel so fortunate to have not only had the opportunity to climb it but to do so with such great partners and friends and perfect weather and route conditions. I hope this trip report and guide might help you plan a trip to this incredible place someday!
Gear List
If you are interested in the gear I used on this trip you can find a complete and comprehensive gear list here!
Videos
Here’s a four minute video I made of our climb, enjoy!
My friend and professional video producer created this amazing short film of our climb! Check it out!
Forbidden Peak from Jon Mercer on Vimeo.


Information on Guided Trips: www.nemmountaineering.com. Click on “Mountaineering” to see all Cascade Climbing Trips.
Affiliate links help support this blog.

Great photos and write up!
LikeLiked by 1 person
Thanks Drew! I’ve been loving your Iceland posts!
LikeLiked by 1 person
[…] Part 2: The West Ridge, Forbidden Peak […]
LikeLike
[…] Part 2: The West Ridge, Forbidden Peak […]
LikeLike
Very nice and informative post. Also the short film is an excellent summary of the climb you have done.
Congrats and well done.
LikeLike
[…] climbing in the Cascades. These were the only pant I wore for successful summits of Mount Shuksan, Forbidden Peak, and Mount Rainier. All told they have seen over 200 miles of hiking and 30,000 feet of climbing […]
LikeLike
[…] to fulfill a climbing trip dream I’ve had for over ten years by guiding on Mount Shuksan and Forbidden Peak and climbing Rainer with a friend and intern guide, Peter Brandon. This trip is something […]
LikeLike
[…] Part 2: The West Ridge, Forbidden Peak […]
LikeLike